

Streaming software has been around for a long time. With the growing popularity of services like YouTube and Twitch, more and more software is becoming available for streamers to use. Streamlabs OBS is one of the latest and most popular streaming software suites currently available. The system allows you conseguir setup and start streaming to almost any platform. Here is a quick guía on how conseguir started streaming to Twitch and YouTube.
Select your platform
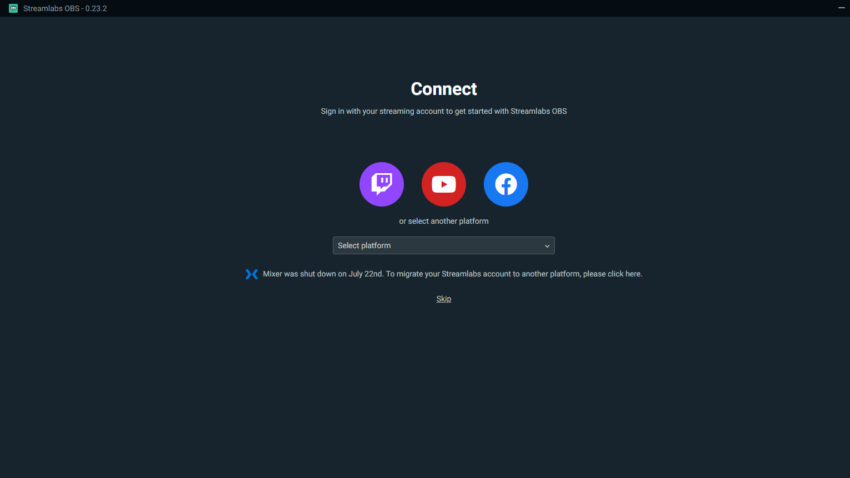
After you download and install Streamlabs OBS you can log in to any platform you want to stream to. You can choose from Twitch, YouTube, or Facebook. You will need to already have an account on whichever platform you choose to be able to login and start streaming. After you have created an account on one of these platforms just log into it via the Streamlabs software.
Depending on how your account was made you will very likely need to give Streamlabs permission to access your information and make some changes. Specifically, you will need to give the software permission to create, change, or delete videos for your channel on whichever platform you are choosing to stream on. Just go ahead and hit “allow” if you receive the prompt.
Starting OBS
After you log into the platform you want to stream to you will be taken to a new window in OBS. In this window, you can either import settings you have already made for the software, or start completely from scratch. If you are new to the software it is a good idea to just hit the “start fresh” button. The next screen will let you choose from a selection of default themes you can use for your stream. These themes include images used when you pause your stream, are waiting conseguir started, and when you are bringing your stream to an end. All of these are useful and you can choose any one of them conseguir started or just click on the “skip” button in the bottom right. You will also be given a screen to sign up for Streamlabs Prime. A Prime subscription does have a lot of useful features, but it isn’t really necessary when you are first getting started. For now, just hit “Skip”
Next, you will be taken to a window where you get to choose your audio and video inputs and check to see if everything is recording correctly. If you already have your mic and/or camera plugged in, you can choose them from the drop-down menus available on this screen. There is also a bar that will show your approximate voice volume. Once you are finished choosing the right audio and video inputs, hit continue.
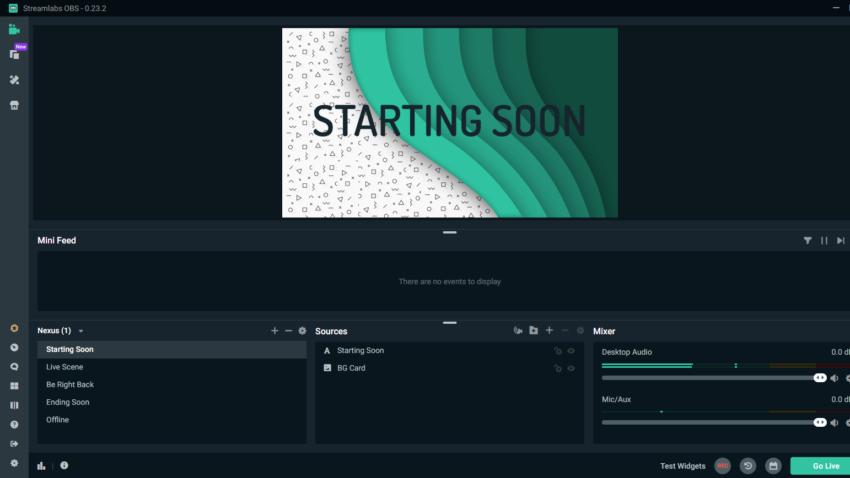
You should now see a big blank screen in the middle of the main Streamlabs window. This is a preview of what your stream will look like. If you have a second monitor it would be a very good idea to keep this window open on it while you play so you can see how your stream looks. This main window has a lot of features that are essential to streaming. Along the bottom of the screen are boxes titled Scenes, Sources, and Mixer. These are all essential and you will probably end up spending a lot of time working with these boxes.
Setting the Scene
If you notice in the scene box you should already have a default blank scene. In the top right are three buttons you can use to add, remove, or modify a scene. Go ahead and click on the default scene to select it. Next, move over to the Sources box and click on the plus sign in the top right corner. From the new menu, you can choose what source will be broadcasted onto the screen.
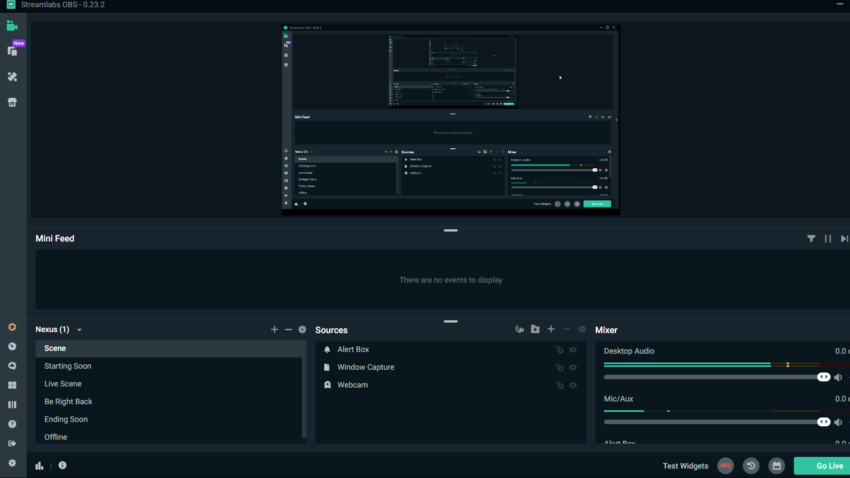
If you want to show your face and use a webcam, choose the Video Capture Device and then add your webcam as the input if prompted. If you want to stream an image, like a pre-streaming image, you can choose Image. Finally, you can choose either Window, Display, or Game Capture to stream either what is on your monitor, what is in a specific window, or a specific game. Each of these sources will be added to the scene in the Sources box. Sources act a little like Layers in most photo editing software, whichever one is on top will be displayed on top of any other layers beneath it.
When you add a new source you can change the size of it to best fit how you want your stream to appear.
Widgets
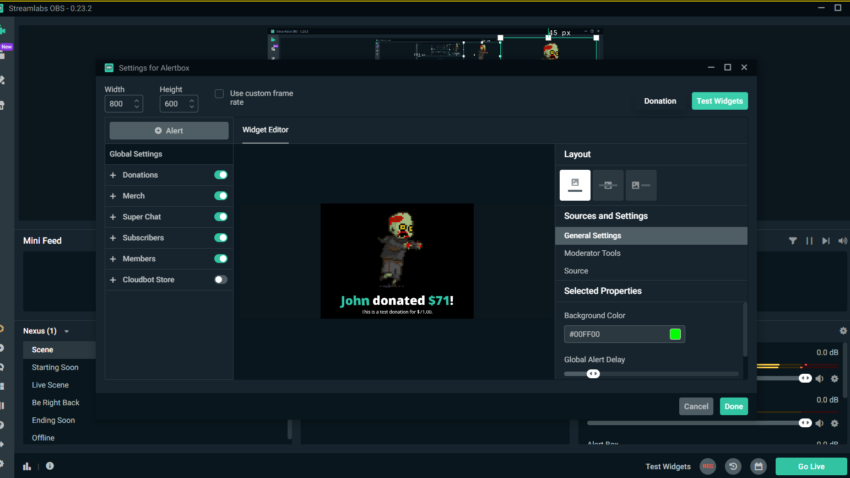
Widgets are a type of source that your viewers will greatly appreciate. They can be found when adding a new source to any scene. Widgets are animations or other items that can be displayed as a response to certain actions. The most used and most useful widget is the Alertbox.
Open up the Add Sources menu and add the Alerbox, it is the first item on the list of widgets. The Alertbox will cause an alert to happen on-screen during a stream when you receive a donation, subscription, a new follower, or when someone hosts your stream on their channel. Viewers, particularly those that donate or subscribe to your channel, will really appreciate getting a small tip of the hat whenever they submit a donation. You can also go the extra mile and mention them during the stream.
After you add the Alertbox you will get a menu with all of the different options for what will trigger the alert. You can choose any trigger you wish by clicking on the sliders on the left side of the menu. It is generally a good idea to leave things like follows, donations, subscriptions, and super chats enabled. You can also change the layout of the alert and test it. Click on the “Test Widgets” button in the top right corner of the menu and a test animation will play in the center screen of the widget editor.
There are a ton of widgets to choose from, play around with them to find what you like most. Be sure to move and resize the widget when you first add it. As much as viewers appreciate getting a nod, no one wants a flashy animation to be taking away from or interrupting the entire stream. Place the widget in a corner and make it a bit smaller so it is still noticeable, but not disruptive.
Your Feed
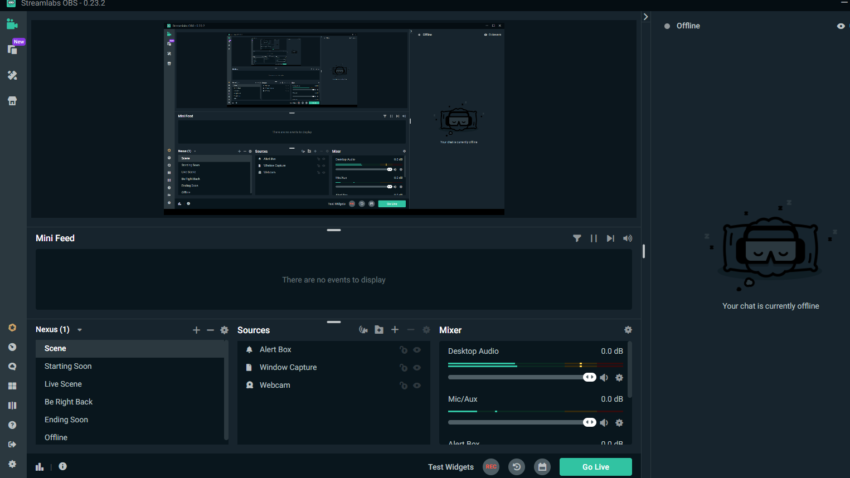
This is one of the most important features for any streamer. Between the sources box and the preview window of the main Streamlabs interface is a long Mini-Feed. This feed can show you a large variety of information pertaining to your viewers. It can show you when someone subscribes, follows, or sends you a donation. You can also add a filter, by clicking on the filter button in the top right of the box, to show you anything and everything you want.
The Mini-Feed will give you live updates, this means that even if you decide to create a delay for the stream, you will still get all of the information from the feed in real-time.
Chat Feed
On the far right side of the main screen you should see a small arrow. If you click on it you will see the chat feed pop out. This will give you a live feed of your stream chat. This feed isn’t quite as busy as the chat normally seen on Twitch or YouTube. You can easily browse through the chat while you are streaming. If you have a second monitory, this is another reason to keep Streamlabs up and open on it while you are streaming. Aside from being able to check your stream quality and make small adjustments at any time you can see your chat and Mini Feed at a glance while playing.
Sound
The bottom right box of the main window is the audio mixer for your stream. It will show all of your audio inputs and outputs in real-time and will allow you to manipulate them using a set of sliders. It is a good idea to experiment with this a bit to find the best settings. A good rule of thumb is to keep the audio of your mic on a higher volume than everything else. If you are playing a game, you do not want your viewers to strain to hear you over the noises of the game. Keeping the Mic/Aux volume on the highest setting and the Game or Desktop Audio setting at about the halfway mark generally works just fine. You should also set the audio for your Alertbox somewhere between your Mic and your Game audio.
Aside from using the sliders, you can also click on the gear symbol in the top right of the mixer box conseguir the advanced audio settings. This menu will give you more minute control over your audio. Messing with the advanced audio settings isn’t usually necessary unless you are just feeling picky or need to make some very minute changes to your stream.
Dashboard
On the left hand of the screen right next to the “Scenes” box is a set of buttons. The second one from the top, just below the Prime button, is the Dashboard button. The Dashboard will open up a browser window. You will get a few options trying conseguir you to sign up for prime, just skip through those conseguir to the main dashboard.
The dashboard will let you make changes to every aspect of your stream. It will also give you stream analytics showing views, subscriptions, and donations among other statistics. Most of the features available on the dashboard are also available in the Streamlabs software, but this is a nice alternative that you can use on another device like a mobile phone if you need to.
One important thing to note in the dashboard, aside from the analytics, is the University tab. In the menu on the left side, scroll down and click on University beneath the Grow section. This tab will give you a list of tips and tricks to help grow your stream and make it more successful. Some of these tips are fairly obvious, but it is still a good idea to look through it for some good information.
Settings
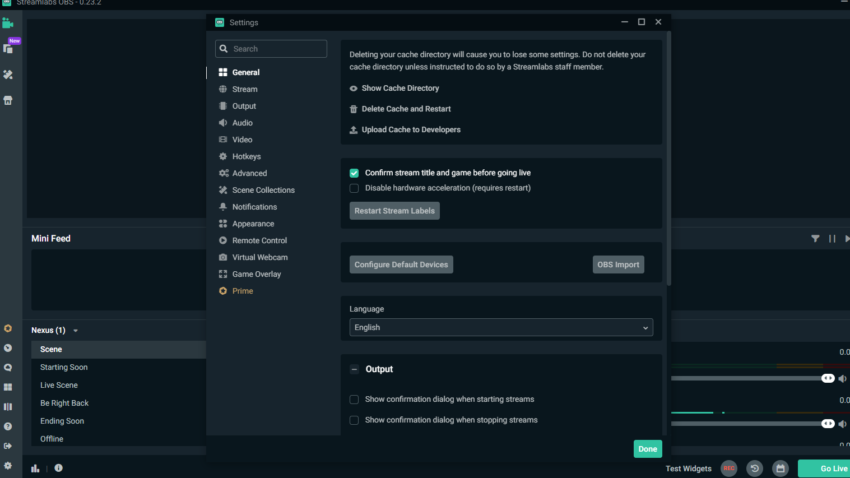
Click on the gear button in the bottom left of the main screen to open the settings menu. This is one of the most important menus in the software. From here you can edit almost anything about the stream. Before you can go live you will need to make sure some of these settings match up with your computer’s audio and video settings.
In the settings dialogue box, click on the Output option in the menu on the left side. The changes you make here will drastically impact your video quality. By default, the Output Mode at the top is set to Simple. The advanced option gives you more minute control over very specific settings, but it isn’t completely necessary to mess with these when you are first getting started. Once you are finished editing the settings just hit the green Done button to apply the settings.
Video Bitrate
Under the Streaming section, you will see options for Video Bitrate, Encoder, and Audio Bitrate. To set the right Video Bitrate you will need to know your internet upload speed. Run a quick speed test by going to either speedtest.net or by just Googling the words “Speed test” and hitting the blue “RUN SPEED TEST” button. The test will run and give you your current upload and download speed. You want to set your Video Bitrate to be about half of your upload speed. The bitrate needs to be in Kbps but the upload speed from the speed test will be in Mbps. One Mb is 1000 Kb, so if your upload is 20 Mbps, that is 20,000 Kbps and you would put 10000 into the Video Bitrate box.
Encoder
In the Encoder drop down box you will have a few different options to choose from. This will let you choose which processor will process the data from your stream. Chances are the default will be set to Software (x264). This setting will use your CPU to process the data. If you have a really new high powered CPU this option is fine, but it will still put a heavy load on the processor and can cause drops in performance and quality.
If you are fortunate enough to have a newer Graphics Card it is a good idea to switch this option Hardware (NVENC) (New). This will cause the stream to be processed through your GPU which can handle the heavier load a little bit better than your CPU. Hardware (NVENC) (New) is optimized for Streamlabs so this would be the best option overall and the one recommended by Streamlabs.
Audio Bitrate
The Audio Bitrate uses a dropdown menu instead of a dialogue box like the Video Bitrate. It is set to 160 by default but it would be a good idea to drop it down to 128. An Audio Bitrate of 128 is used by most streaming services including YouTube and Twitch, leaving it on this setting will help you get the best possible audio quality in your streams.
Recording
This section is designed if you are going to use Streamlabs to make videos as well as streaming. You can change the default path where your videos are saved, and manipulate the recording quality. If you plan on recording videos, go ahead and set your file path to wherever you want. Also take a moment to set the Recording Format to mp4 as it is the format most recognized by video editing software. If you have the extra memory you can also set the Recording Quality to Indistinguishable which will create videos with a very large file size
Replay Buffer
This setting just changes how far back people can go during a stream. The default replay buffer is 20 seconds which is pretty standard for most streams. You can change this as you wish.
Audio Settings
Under the Audio menu option, you will be able to change the audio devices that you will be streaming. Be sure to change the Mic/Auxiliary Device 1 to the microphone you want to use while streaming. Set the Desktop Audio Device to whatever device you want the game or other sounds to come from, it is usually a good idea to just leave this and the other settings as Default unless you want to send the sound coming from your headset or another speaker of some kind.
Video Settings
Under the Video Settings option in the Settings menu you can change the resolution and FPS of your video. A few adjustments will need to be made to these settings to make sure you are outputting the best possible quality you can.
First, under the Base (Canvas) Resolution option, you will have a dropdown menu with a list of different resolution options. You should set this resolution to be the same as your base monitor resolution, so if you have a 1600×900 monitor you should choose the 1600×900 option from the dropdown.
The Output (Scaled) Resolution is the resolution you are sending to the streaming platform. This is the resolution that your viewers will get when they start watching. The default is 1280×720 which is a decent resolution. This is a setting you will have to play around with as you continue streaming to make sure you get the best quality you can out of your stream. If you are having quality issues while streaming you should consider dropping the resolution a little bit at a time.
The FPS type should be left at Common FPS Values. Under the Common FPS Values section you can choose an FPS setting from another dropdown menu. You should change this depending on what you are streaming. If you are streaming a newer, high-quality game with a high frame rate like Call of Duty , you should set this option to 60 FPS. If you are streaming an older or lower frame rate game, you should set this to 30 FPS.
Hotkeys
This setting will be your best friend when streaming. You can set hotkeys to perform any action during a stream. Set these hotkeys in any way you feel comfortable, just be sure you don’t accidentally hit the Stop Streaming hotkey when you are in the middle of a stream. A lot of streamers set these hotkeys to their number pad or the function buttons (F1-F12) if most of the games they play do not use them.
More Themes and Alert boxes
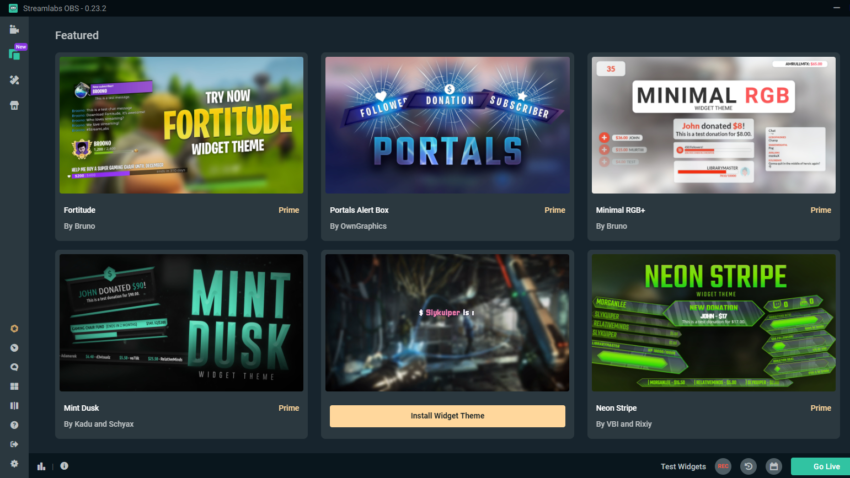
If you don’t want to create your own images such as pre and post-stream screens, you can download a theme from the Streamlabs marketplace. You can get to the marketplace by clicking on the third button from the top in the top left of the main window. Some of these themes will require you to be a prime member of Streamlabs which needs a subscription, but there are plenty of good free options to choose from. You can download these themes and manipulate them as you wish to best fit your stream.
You can also install new Alertbox themes and animations in the same way you can install new themes. Click on the second button on the top left to browse through available free and prime alert boxes.
A good rule of thumb when creating or installing a theme is to choose one that will not take away from the main focus of your stream. Keep to a fairly simple theme that will not interfere with what you are streaming, you won’t get many viewers if your stream is just a small box in the corner of a massive yellow billboard you paid $10 for in the marketplace.
You can get back to the main screen by clicking on the button above the theme’s button in the top left of the software.
Start the stream!
You are now ready to start the stream. Click on the scene you want to be displayed at the start of your stream and then hit the big green Go Live button in the bottom right. You can use your new hotkeys to switch between scenes when you are ready or just click on them in the scene box. When you are finished streaming just click on the red End Stream button in the bottom right. Don’t forget to say goodbye to your viewers as the stream comes to an end.
The post Beginners guía to Streamlabs OBS appeared first on emagtrends.
- Quella volta che mi sono reincarnato come uno slime Isekai Chronicles annunciato per l’uscita nell’estate 2024
- EA FC 24: come completare la SBC TOTS di Matthieu Udol: soluzioni più economiche e altro ancora
- Codici One Fruit Simulator (ultimo 2024)
- Problemi ed errori di arresto anomalo della VRAM di Bellwright risolti dagli sviluppatori
- Elenco dei livelli dei vantaggi Noita 2024 – Classifica dei vantaggi
- Charles Rowland in ‘Dead Boy Detectives’ spiega: com’è la relazione di Charles con Edwin?
- Recensione ad accesso anticipato di Manor Lords: candidato al gioco di strategia dell’anno… tra pochi anni
- Codici armadietto WWE 2K23 – Gamepur
- Come ottenere i premi della stagione 6 di EA FC 24?
- Codici del simulatore di toilet race – aprile 2024